
I made Rapunzel hair for my 3 year old for Christmas, and I discovered that it's surprisingly easy - and cheap. She loves it, and you can style it and restyle it several different ways. Braids are recommended, however, to reduce the occurrence of tangles.

Supplies:
two 7 oz thingers of yarn (you'll use about 1 1/2) - I used Red Heart - Cornmeal (color)
Big fat detangler comb (pictured below) - it's the best thing to comb yarn with
sewing machine
ribbon
scissors
two chairs
child's head
To begin, figure out the desired length of hair. I measured from the top of the head to the floor, plus 6-12 extra inches. (Remember, hair gets shorter when you braid it) Place two chairs far enough apart that when you wrap the yarn around it will equal double the desired length. My child complained about the hair only reaching the floor at first, but I explained to her that it would be unreasonable for it to be any longer. It gets pretty heavy to drag all that hair around. It this won't fly with your little one, I've seen Rapunzel hair that's just a thin braid wrapped around the head that drags much longer. Personally, I think my way is much more elegant.

Tie the end of the yarn to one of the chair posts and start wrapping. Be careful that you don't accidentally cause the chairs to scoot in while your wrapping. That happened to me with the first hair that I made, so there's a couple different lengths. Empty the first ball of yarn, tie off the next one and start wrapping. To make it easiest, I put the ball of yarn on the floor and guided the yarn in my left hand and wrapped with my right.

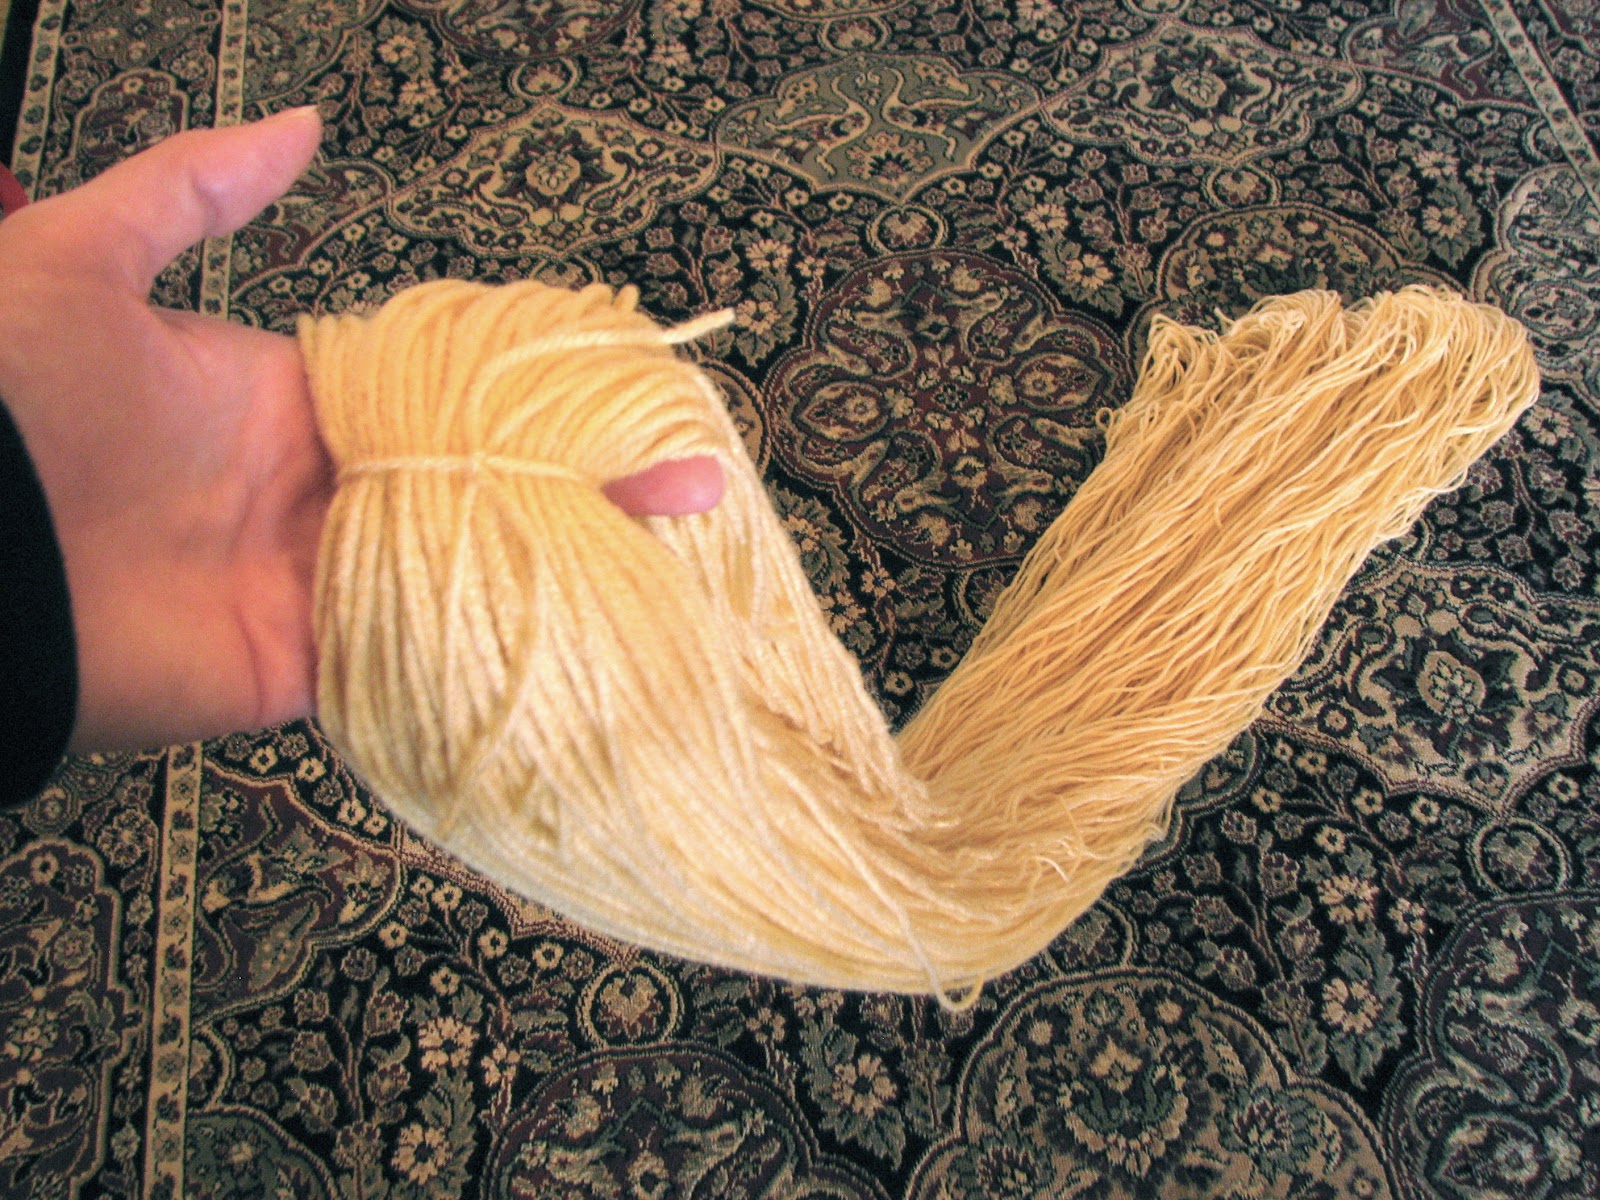
Pictured below is how thick I made it. The end thickness will be double this since this accounts for only half the hair. You want enough hair to cover the child's head, but not too much, cause you don't want it to get too heavy. Snip the tied off ends and pull the hair off, keeping it securely in your hand so it doesn't shift around and get messed up.

Get a little string and tie it off at the top to keep it secure. On to the sewing machine!
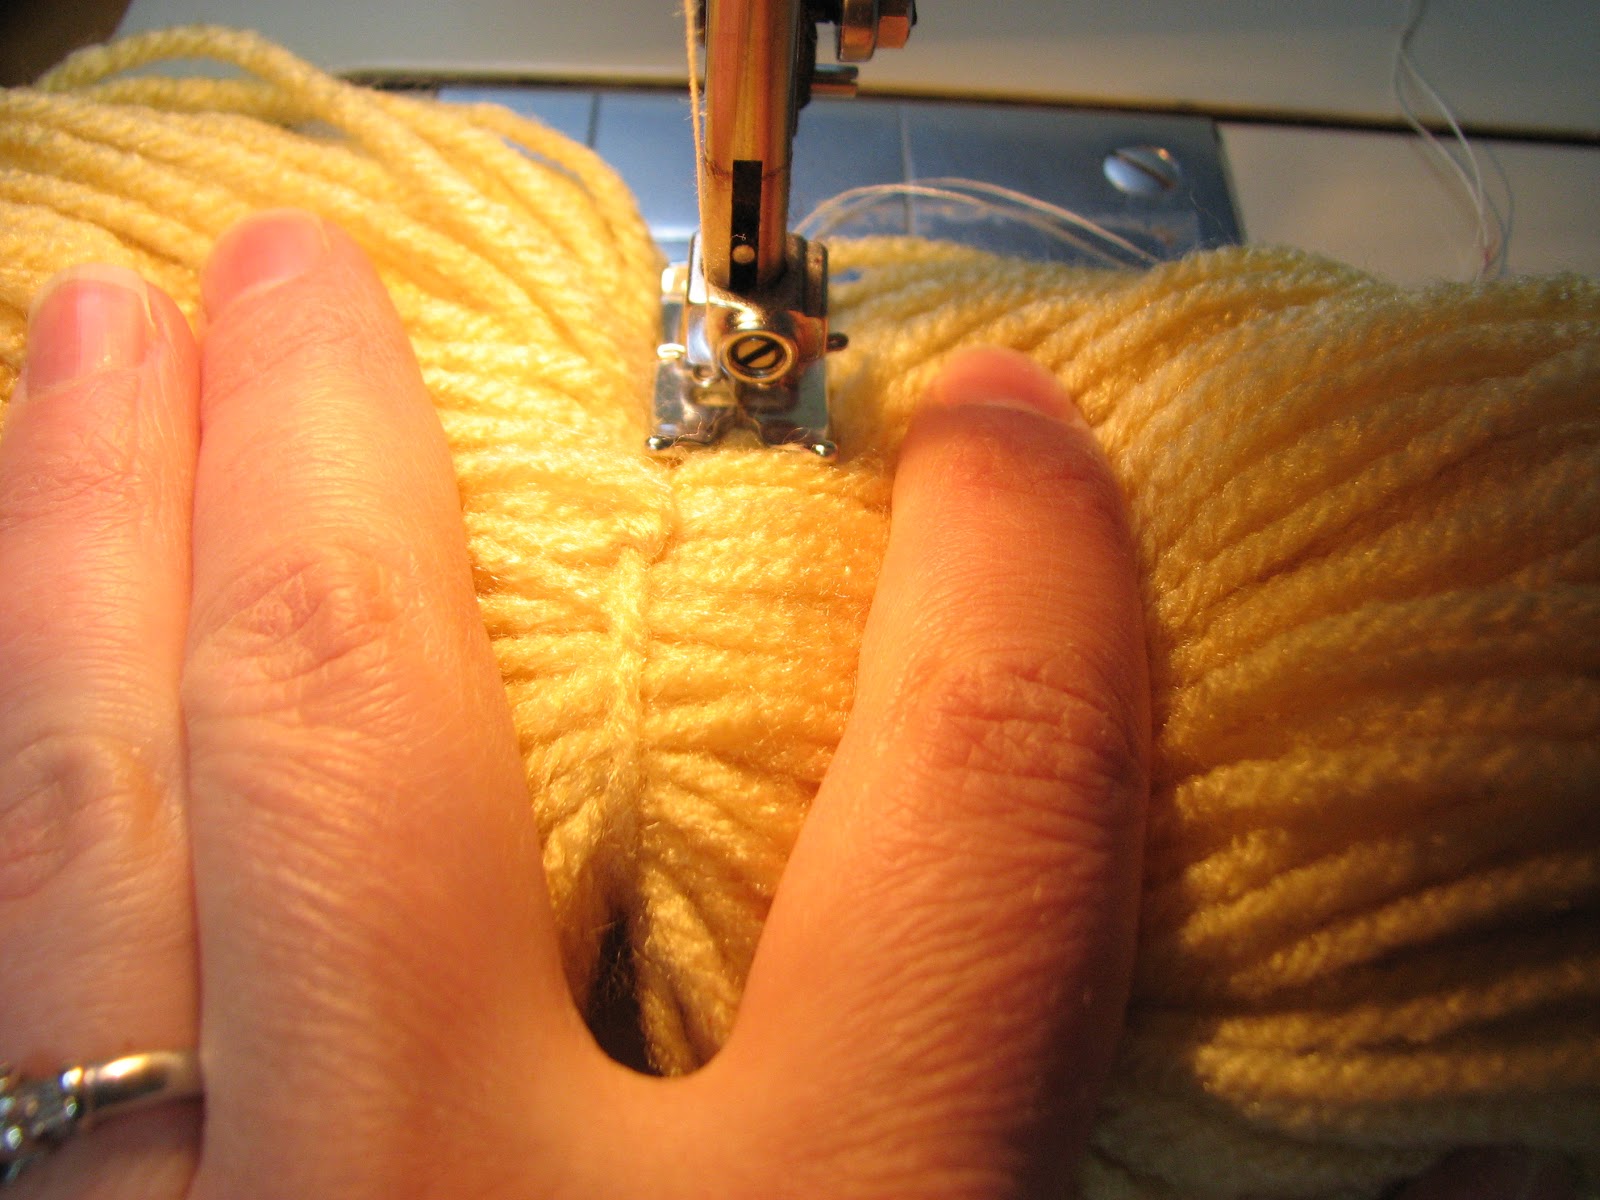
Sew that fatty glob of hair through, remembering to back stitch at beginning and end.
Now, when you pull on the hair at the beginning and end of the seam, the seam will elongate. Do this.

Then fold it in half and sew on the seam again. It shouldn't elongate anymore after that.

Now, we brush the hair with a big fatty comb, like thus...

and snip the loops on the end of the hair. Trim it up to look even.

Now, we style the hair. Put child in front of the T.V. and place the seam on top of the head, starting at the hairline, with yarn falling on either side, with the bulk of it in back. It should cover all the hair on the head. You'll probably need that big fatty comb again.

The chunk of hair that I'm holding in the picture below is important. It holds the hair on. Get two chunks of hair (one from each side) and pull it around to the back of the head.

Tie it off at the base of the head, nice and snug, to hold the hair on. Now, braid all hair. Tie it off with a ribbon.

You may notice that in the pictures of the first Rapunzel hair I made, there's a braid across the top and front of the hair. This is a little piece that I braided separately and sewed on. Originally, I used it to hold the hair on, as I pulled it around back of her head and tied it under her hair. I've discovered, however, that it is uncomfortable and that securing it the way showed above, works just as well, and much more comfortably. You can still add a braid in the front, if you wish. I would take a chunk (unattached from the sewn hair) the same length (double length) as the rest of the hair and braid it and sew it on at the seam. This will give her two braids hanging down in front. You could also do the same thing, just braiding the portion that will be on the head, and incorporating the rest of it into the main large braid. That way, you'll have the braid across the top without the two braids hanging in front. (I would have done this with the second Rapunzel hair, but I ran out of yarn.) Lots of options. This is a fun and easy project, and your little girls will love it. It's also a cheap wig idea for halloween costumes. Hmm, is it time to buy some black yarn?
Oh yes, messy children may require washing. I haven't tried washing the hair yet, but I imagine it's possible. I would make sure it's braided tight, then tie it into a pillow case, and wash it on a gentle cycle in the washing machine. Or, you could hand wash it. But, like I said before, I haven't tried it yet.
Happy crafting!
this is fabulous... i'm going to try to make a long braid to hang out my window and will use your technique.. thanks so much for posting.. your daughter looks adorable. :)
ReplyDelete